Today In this post, I will show you How to create Hard drive Partition in Windows 10. You can create multiple drives without formatting your Windows 10 Laptop or Desktop.
Normally, This method is used when you buy a new Windows Laptop or Desktop. I have a new Laptop with 1TB of Space in C Drive and I will Create D drive from C Drive by creating Partition.
This method is Super Simple, even a beginner can perform this method and it’s totally safe. Also, the method is the same for all Windows versions like 10, 8, 8.1 or 7.
If you’re searching for how to make partition in windows 10 while installing then the method will be different.
I will show you How to Create Hard Drive Partition in Windows 10 and for creating C Drive partition in Windows 10/8/7 this method is the best.
So, without wasting any time let’s get straight into the steps.
Watch Video:
How to Create Hard Drive Partition in Windows 10
Step 1: Open Disk Management

Firstly type Disk Management in Windows Search bar and click on Create and format hard disk partitions.
Step 2: This is My C Drive
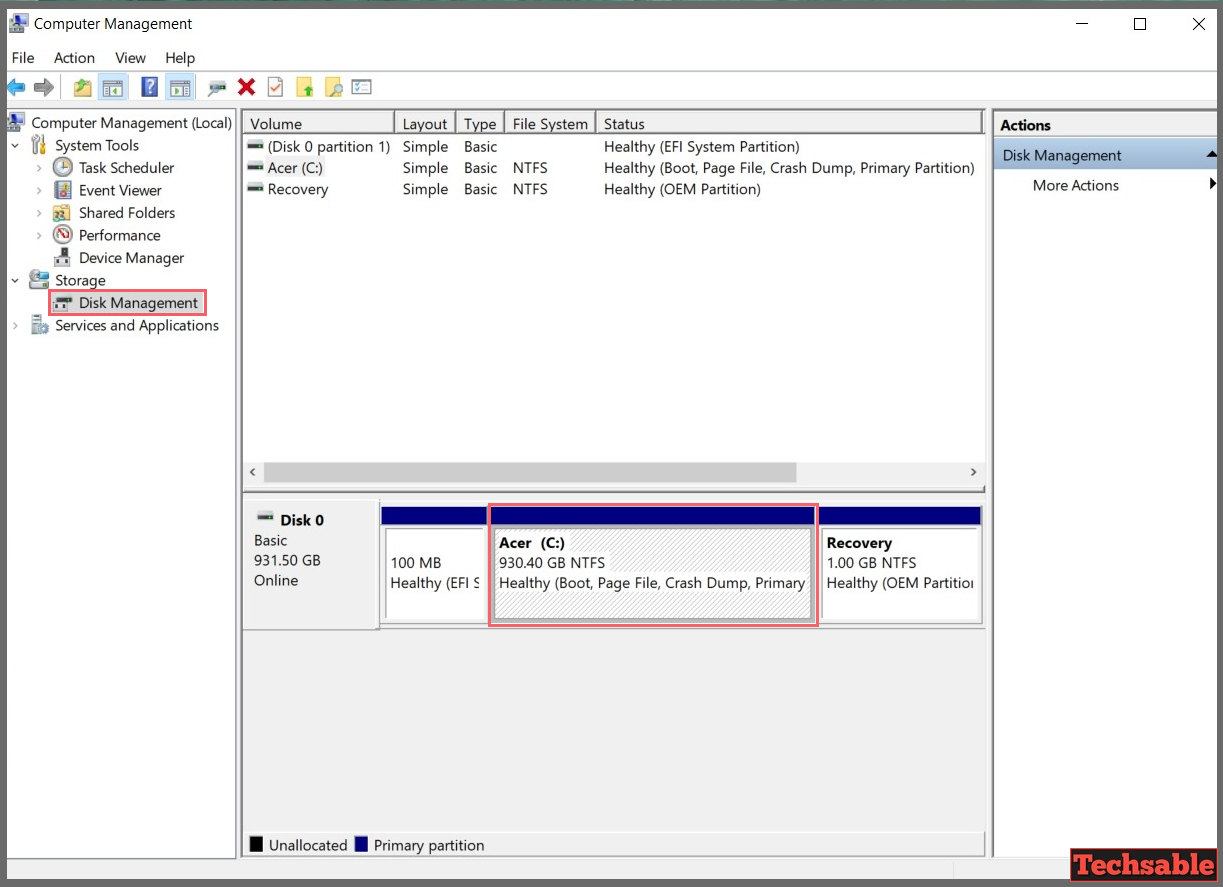
Now we’re in the disk management section. I am going to create a partition of C drive to Create a new D drive.
Step 3: Shrink Volume

Right-Click on the Drive and Click on Shrink Volume.
Step 4: Enter the Amount of Space Needed to Create New Drive

In the third section, We have to enter the amount of space we want for a new drive but in MB. If you don’t know how to calculate GB in MB then Search on google for GB to MB Converter.
So, as you can see I entered 319294 MB which is equal to 311 GB.
After entering the amount of space for a new drive, click on Shrink.
Step 5: Unallocated New Drive Created
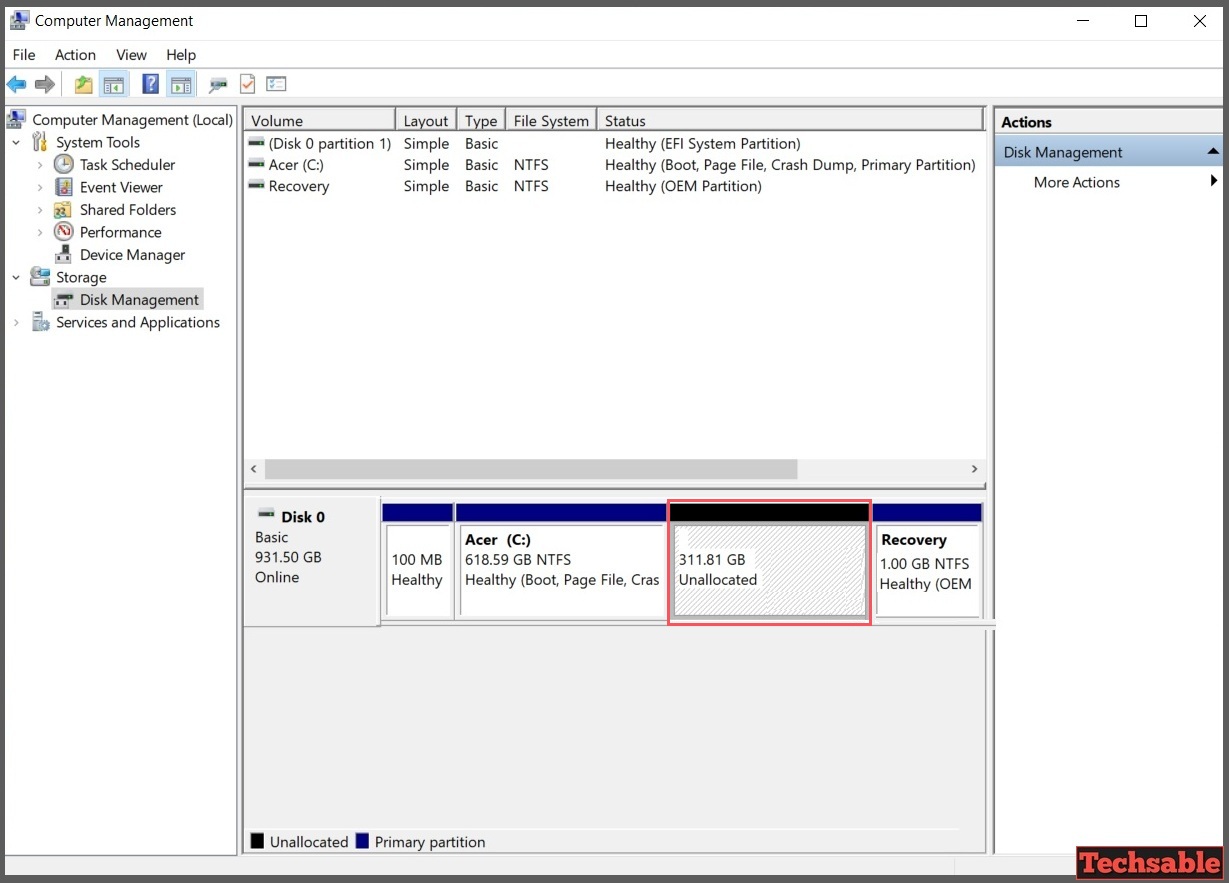
Now, we have a Drive of 311 GB but it’s unallocated. We need to give this drive a name, a drive letter, and a File system.
Step 6: New Simple Volume
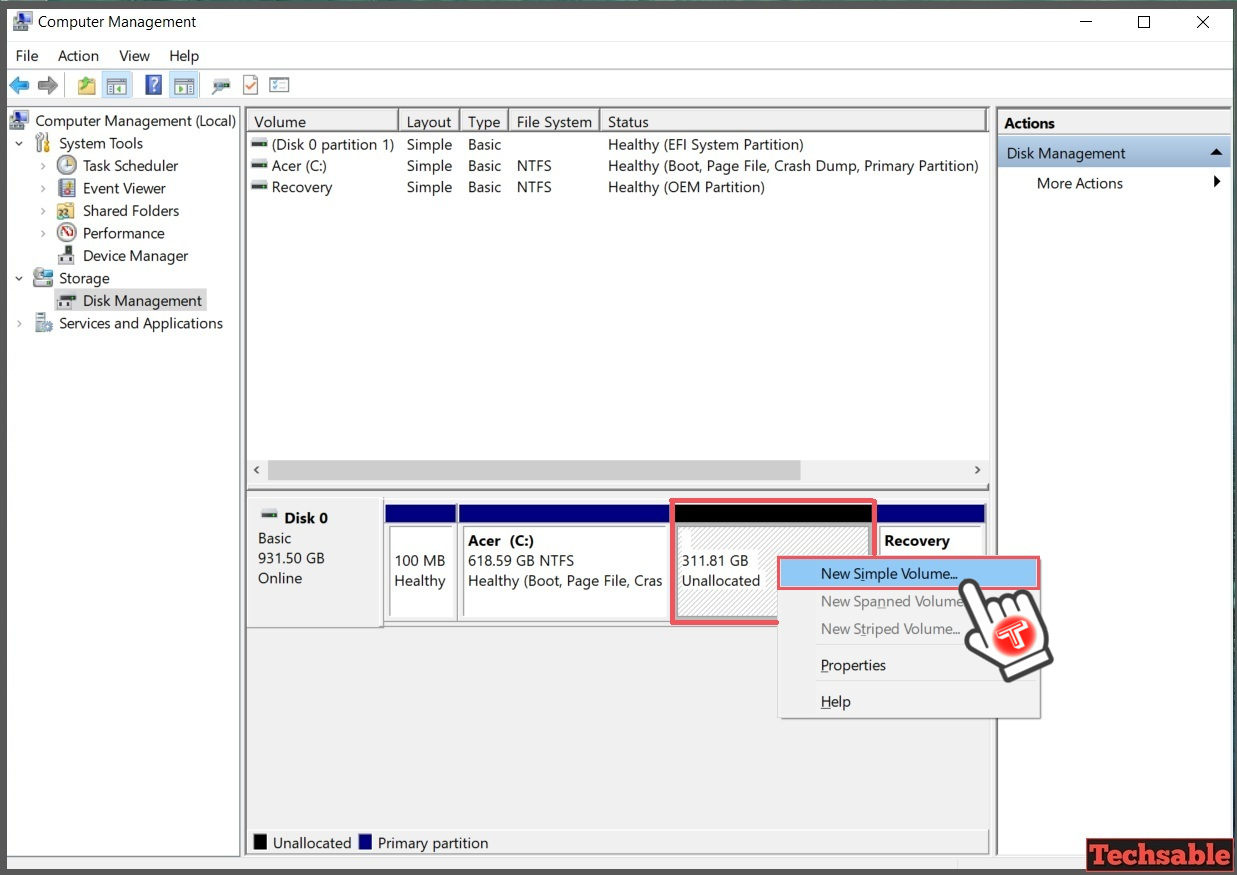
Right-Click on Unallocated Drive and click on New Simple Volume.
Step 7: Click on Next
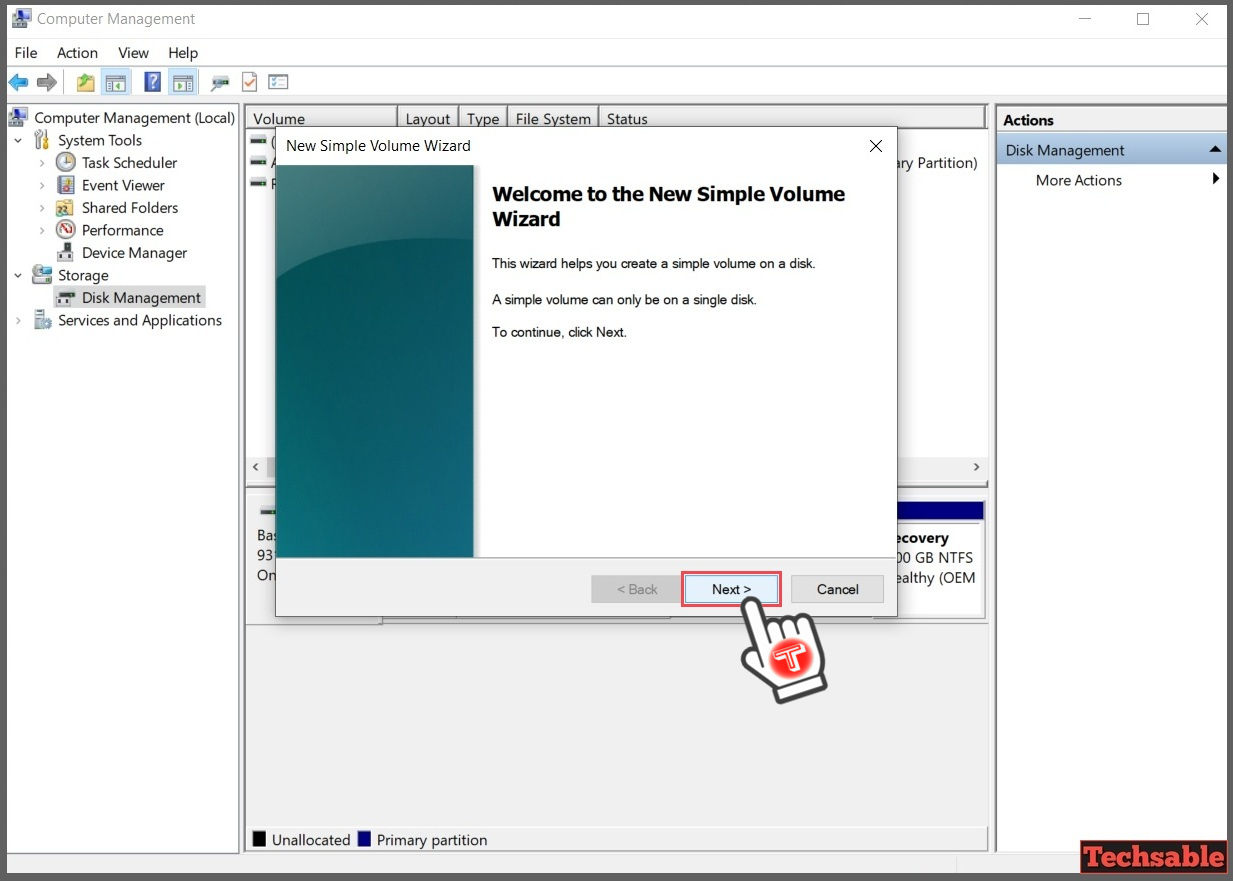
You can see here a new simple volume wizard, simply click on Next.
Step 8: Specify Volume Size
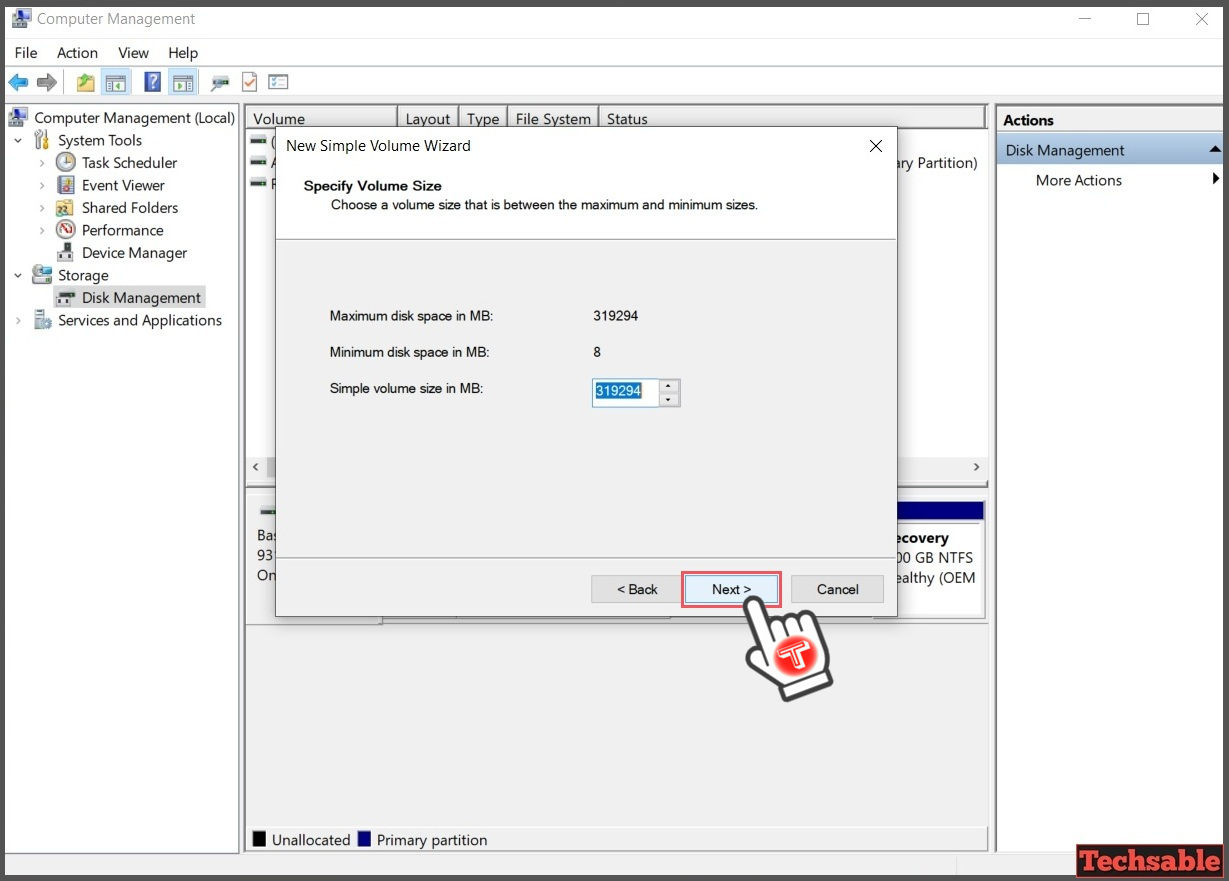
Specify the Volume size option, you don’t need to change anything in this step. This option used to create another partition from unallocated space and we don’t need it. So, Click on Next.
Step 9: Assign Drive Letter
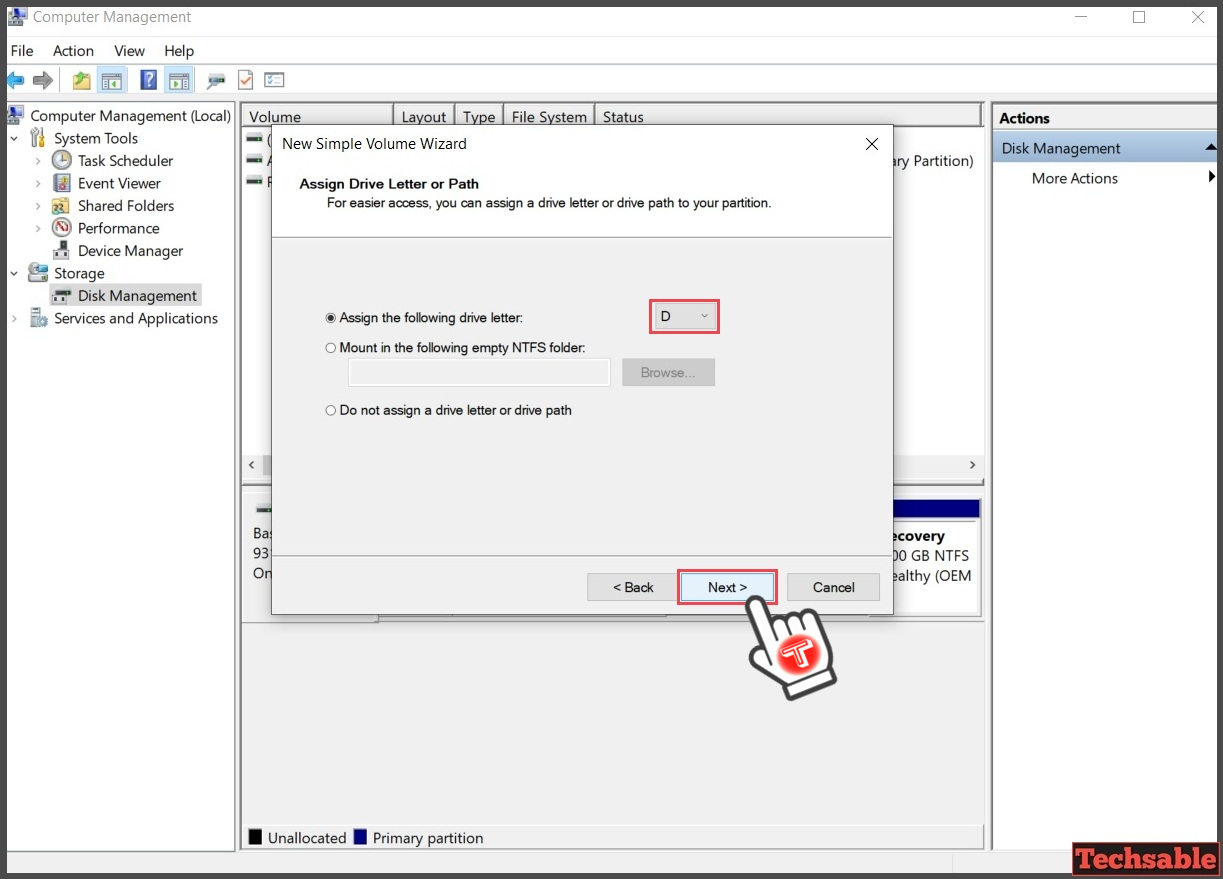
In this option, we can assign our drive a letter like D, E or F. I am selecting D now Click on Next.
Step 10: File system and Volume Label

In this step, Select File System as NTFS and give the drive a name by changing the volume label. I am leaving the name as New Volume because I can change it later anytime.
Now, Click on Next.
Step 11: New Simple Volume Wizard Completed
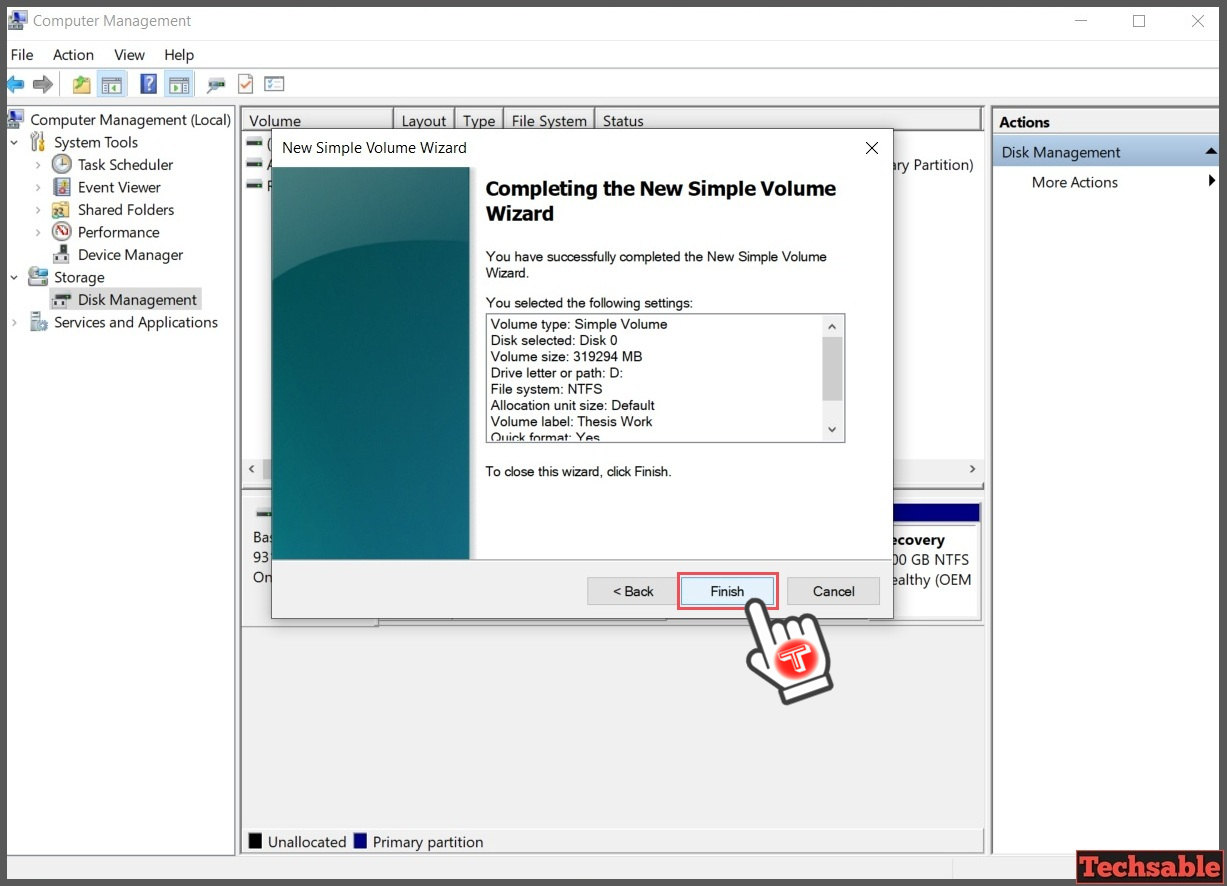
You have successfully completed the new simple volume wizard. Click on Finish.
Step 12: New D Drive Created Successfully
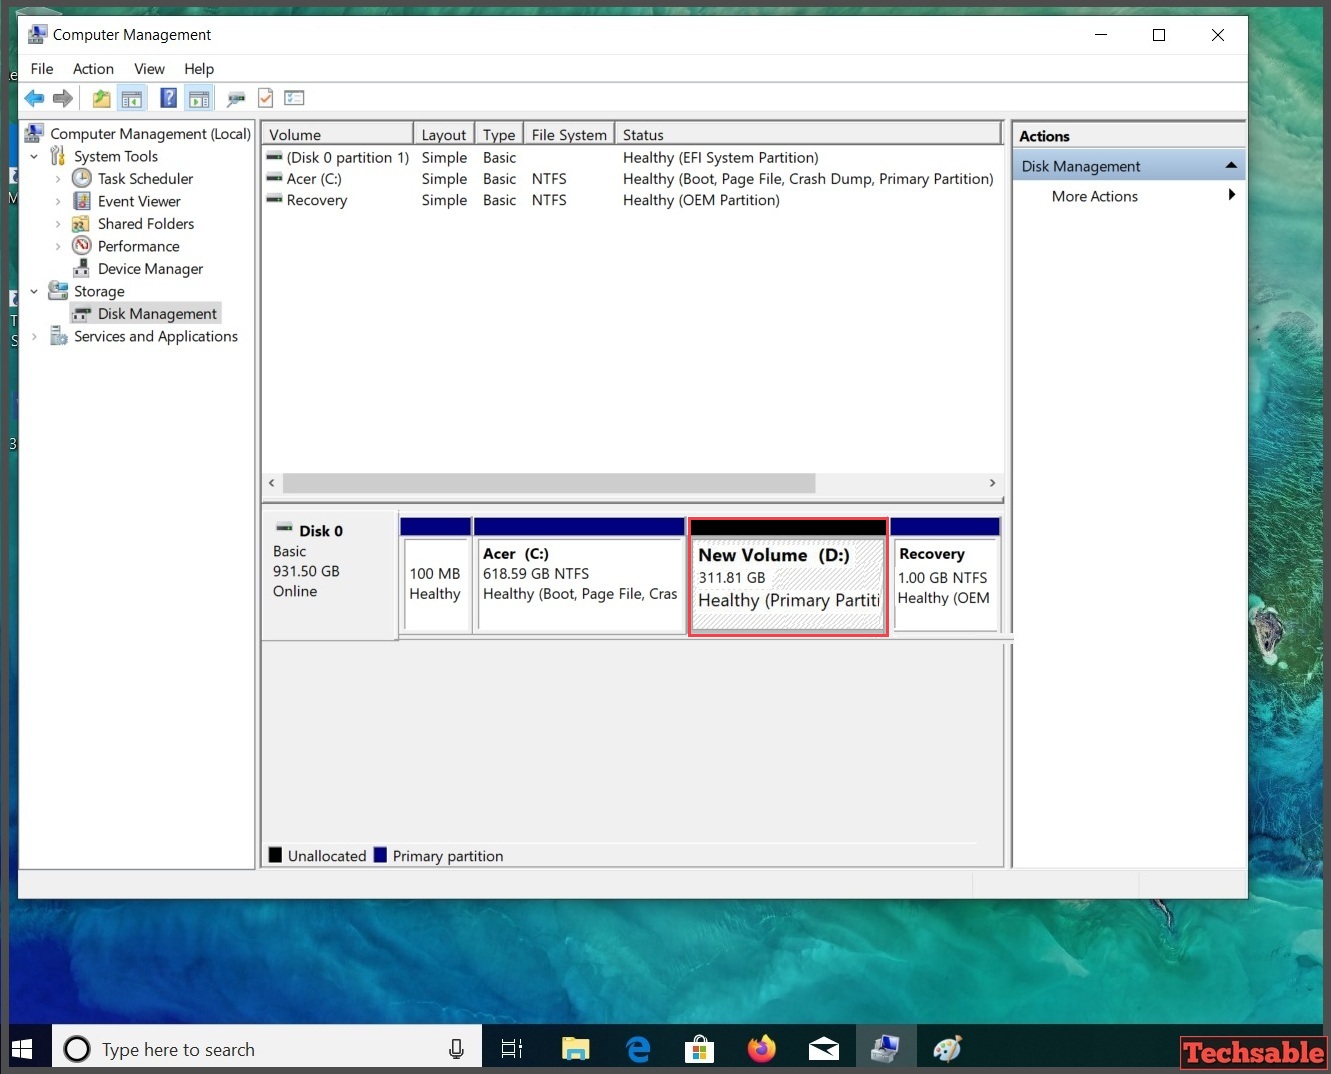
As you can see, Finally we have a New Drive D: of 311 GB. I created the partition from C Drive and created a new D Drive.
That’s how you learned how to create Hard drive partition in Windows 10. Having any queries related to the topic, write in comments.


