

System Restore in Windows 7 is the feature in Windows that allows a computer system to be rolled back, or restored, to a point before certain events took place. For Example, Prior to specific software or hardware installations.
System restore is a powerful tool that in most cases, should not be disabled. Windows having lots of features but it is difficult to get knowledge about every feature.
It is difficult because we learn about those features we need to know, that’s why a normal user doesn’t have any knowledge about these features like system restore.
Whenever we install, uninstall any software, or make some changes in system settings or delete any file by mistake from the recycle bin also, system restore will help you out from all of these issues.
Example: Ram is running out on your PC and suddenly you decided to remove some unnecessary software and by mistaken you uninstall the audio driver.
After this, you play a video and sound is gone, now you’re remembering about you uninstall the audio driver, but it is too late now.
How to use System Restore in Windows 7
System restore rolled back your PC in the previous date when your audio driver existed in software, get it.
The system restore tool allows restoring…
- System Settings
- Application/software.
- Any File.
It means you can restore almost everything from system restore in windows PC.
How to Create a Restore point in System Restore?
I am using windows7 in this tutorial, for your information.
Follow these steps to create a restore point:
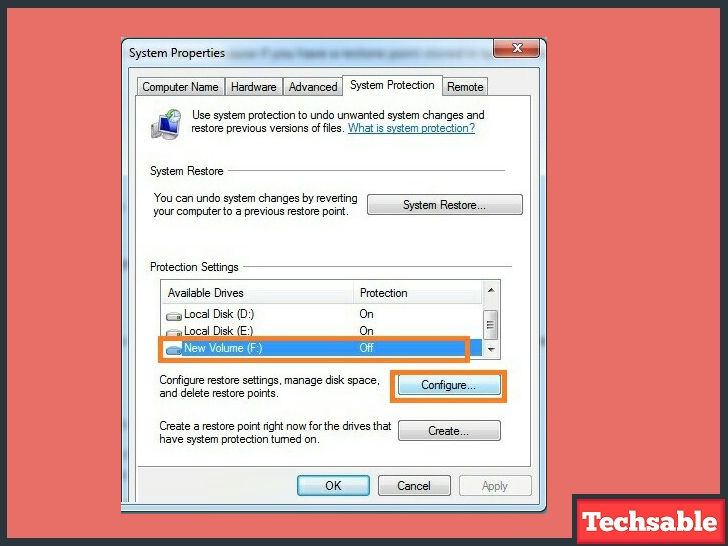
- Open system restores tab.


- My computer>>System Properties>>System Protection (Another way to find system restore tab.)

- Type in search “Create Restore point” (Then you will get system restore option in the list).
- Then you will see a window like this

However if you want to create a restore point manually,
· Click on Create>>enters any name which will help you to remember the restore point you’re going to create like tag or label.
· Open this tab again and Choose Drive>> click on system restore>> choose a restore point>> restore.


